Wednesday, March 30, 2016

Club Scrap: A Paris Flea Market Blog Hop

This Month the Kit was "Paris Flea Market", and I am saying this is one of my favorites.  The hop is underway and if you are hopping in order,  You should have arrived from Deb,   If not, click HERE  to start at the very beginning.

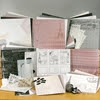
Here a view of all my cards.  I am going to start with my favorite, then the more complicated one and finally, a clean and simple card.

Card 1:  This card represents my Technique Post.  I found this process and the resulting card to be something of "magic".  I think I was more impressed by the outcome than I have been in a very long time.  I just love this look.  It is an Acrylic Paint Resist Technique.

Even in the photo it looks amazing, but in real life, it has depth and interest that is not apparent here.  So how did I make it?  Well lets start with a close up.

The focus of the technique is the Birdcage and the bird.  I wanted the Paris stamp to act as a background and the birdcage to move to the front.  This is hard to do with stamping and heat embossing.  Often the heat embossing "stands out" and I wanted this to be flat.

Step 1: used Distress Paint in Picket Fence to cover my stamp and then stamp onto white paper and allow to dry thoroughly.  I have done this with other acrylic paint, but I chose this one for 2 reasons:
the dauber and it is easily cleaned off of my stamp.  Spray with water and wipe, all gone.  The other acrylic paint is hard to get off of the stamp.

Step 2:  Stamp the second image in a pigment ink.  Here I used Archival in Potting Soil.  Can you see the bird cage?  It is there!!

Step 3:  Ink.  I used Aged Mahogany and Peeled Paint.  For this to work, you have to rapidly wipe of the acrylic stamping to deep white.  If you look at the bottom of the birdcage, it is slightly darker, I wasn't fast enough, but it still works.  Go slow and layer gradually. This image is after the initial inking, I went on and added more.

 I think this works and is so stunning in part is because of the color combination.  Play with this and try different combos.  It is fast and easy.  The best part is that the acrylic stamping is perfectly flat.  If you don't tell how you did this, it would be hard to guess. When I felt it was complete, I cut to size and mounted.

I had wanted to use this as a background and add something on top.  I just could not.  The background needed to be the focus, so I set it off with layering and a simple silver ribbon.


Card 2:

This was more of a challenge.  The first one just happened, this one, well it is a mistake turned into a Pocket card!!

 Step one:  Cut the 12 x 12 into an 81/2 x 11, score at 4.25 and cut in half.
Step 2:  Turn these 2 pieces into a Tri-fold
 First add adhesive to what will become the back of the center panel,
Adhere them together to create a Trifold, easy!!

Step 3:
Cut from corner to fold.  I was intending to cut from top corner to bottom corner and create a criss cross card.  Well I got confused and cut from top of one to fold, but cut the second one from bottom outer edge to fold and got this!!
Oh goodness if that did not give me pause, oh well I just stopped and rethink it.  In this photo I have put score tape on the inside flaps, and covered them up with pieces cut from the lace mats in the kit.

Added the center part to flap and edging to sides.  Now what do I do with it.
I took one of the triangles I had cut off, and decided to make a pocket.  First I cut a pink paper and covered the back of the card, then added the pocket..Ok I can use it for a gift card.
Now to figure out the from so it made sense.
Here you can see the inside.  The flap with pink paper behind.

So I needed a Belly Band.  I cut a strip 1.75 inches and scored the ends, glued the flaps and added a flower.  
Here is a little trick:  Score the first line on the band, then 1/16th inch away score a second line.  This will form a box like end, that will fit the card better than just a single score line.  Double click to see this up close.
All I needed was a sentiment and another completed card!!!

Ok we are on the home stretch!!

Card 3:

This is the most simple of the cards but in some ways a bit more challenging.  Getting the printing so it looks right!!


Step one:
Trim that stamp so you have a nice straight edge and use this as a reference.  Easiest to do this to the top of the stamp, the Decenders in the lettering makes the bottom irregular.  That is partly how this gets challenging.

Step 2:
Use a stamp positioner with a black ink.  Take your time.  This was stamped in Versafine black onxy on the plexiglass, then the card stock was stamped with Versamark and heat embossed in clear.
It took several trys to get it right.  I staggered the lettering to get the desenders to fall in the text in a way to appear as a continuous writing.  
Step 3:
Once stamping completed, I inked with Pumice stone and Aged Mahogany, cut it down to size and mounted onto a white card base.

Step 4:  Stamped the sentiment in Black and heat embossed in clear, die cut and mounted it onto a black strip of card stock.  Finished.

That is all from me, your next stop is:  Jennifer
Happy Crafting,
Josette

Links:


Other supplies used:  Distress Inks, Distress Paint, Versamark, Versafine Black Onyx.  

Wednesday, March 23, 2016

Club Scrap: Team Challenge

Hello, time for Team Challenge.  This month the challenge was to use paper lace doilies and or a set of tags that was included with our kit.   You should have arrived here from: Jennifer or if you lost, you can start at the beginning by click here.

When  I saw the soft pink and doilies, wedding came to mind.  So my first project is just that.

Project 1:

Lets start with the card base.  This is not a standard size.  I was limited by the doilies and the embossing folder.  I needed enough room for the dress.  So, slightly larger than an A2 and not quite a 5 x 7.  This is an example of just "making it work.  Because of the size constraints I started with the embossed card stock, created the doily and finally the dress.
So lets start with the embossing.

The pink glimmery cardstock in the kit was perfect and I had a Tim Holtz embossing folder that was a perfect match.  This paper is thinner and the folder embosses deep.  How to keep it from cracking.
I cut a slightly larger piece of paper and spritzed with water, then used a tab on my Big Shot that did not give me a lot of pressure and held my breath!!!  Perfect.  Once it dried out I trimmed it down.  I left the bottom edge alone (where it did not emboss) and covered it with a ribbon, as I needed the length.

With that step done, I needed to fabricate the "doily matt".  The matt measurement was shorter than the doily.  So I needed to trim it down but wanted those corners.


I layered two doilies until the design aligned perfectly, glued them together.  The edge of the dress will cover that area as well.  This was case of planning at every step.  The matt was adhered to the embossed panel then a ribbon was added to the bottom and a bow with charm to the top and finally all was adhered to the Grey cardstock that had been cut and folded into the card base.

On to the dress.  There are many different patterns and ideas for dresses on Pinterest.  But I needed a specific size that would fit on my card and also work with my doily.  So with ruler and a coffee filter created the dress pattern.  I used the coffee filter for 2 reasons.  The first was that it is cut into a perfect circle.  I marked the center.  The second was it has fold already to help me shape my dress.


The dotted lines are the valley folds and the solid are the mountain folds.  I just roughly cut it in half and used the pattern on my doily to fold it.


Cut out the center of the doily and carefully placed my pattern to maximize the pattern on the doily.
Cut out the pattern and then folded along the fold lines on the pattern.
the dress is adhered on the card in the middle and on the two sides, giving a 3D look.


Created a bodice pattern, cut it out from the center of another doily, backed it with pink paper, added a jewel and mounted it on the card with glue dots and dimensional foam squares.

Finished!!  No sentiment required.  I will place the message on the inside.  Ready for the next wedding.
Close up of dress
Project 2:


Simple card.  this is an 5.5" square card.  I stamped the sentiment on white cardstock with a grey archival ink and distressed  with Pumice Stone Distress.  This was die cut using a spellbinders die and mounted on a grey mat that had also been cut with the same die.  The tag is from the kit, threaded with antique looking ribbon and embellished with abalone shell buttons.  This was also distressed with pumice stone and stamped in a grey archival ink (Wendy Vechi Watering Can).

The pink and grey paper from the kit was cut into a 5.25" square mat and all was layered onto the grey 5.5" square card base.  Simple and elegant.  Perfect for a friend.

This card is flat and very simple because it needs to be able to fit into Project 3.

Project 3:  The Envelope.

This is the easiest project ever.  I took the doily and scored along the edges of the solid center.

Notch out the corners so it will fold and not bunch up.
Added score tape to center and edges.  Cut a square of the pink shiny paper that was included in kit and adhered to the center.  This is for stability.  Then folded up the edges, glued everything closed except the top and added a button.

Finished and open.

Card fits perfectly in envelop.  If I were to mail this, I would make an envelope out of cardstock and slide this set into it.  This idea would make nice invitations for an anniversary or wedding shower.
A perfect Pair!!!

Thank is all from me.  Your next stop is:  Debbie.

Be sure and stop by next week for our monthly Blog Hop,
Happy Crafting,
Josette

Links:
http://clubscrapClub Scrap
Paper Lace Mats
White Tags
Paris Flea Market, Deluxe Kit

Saturday, March 19, 2016

Special Cards: Special Technique: Update

Hello friends,
I have been absent for a bit.  March has been a month of change and travel.  My crafting time has been severely limited but I did manage to make a few things. So what have I been up to!!
Well, my eldest daughter got married in Washington State.  So we spent the first part of the month finishing details and traveling.  It was a beautiful Wedding!!
Siobhan and Troy Silva
When we returned from Washington, I started a new position at Texas Pain Relief Group.  In the two years since I last worked in Chronic Pain, there has been a huge explosion of medication and treatment options that have become available.  So, I have been rapidly learning all about the newer medication and the ramifications of Pain Management in Texas, oh so different from Washington.  But I love the Clinic and the patients.  I am truly enjoying the challenge of this type of practice.  I am not cut out for urgent care.  I need to know I am making a difference and every day at this clinic I am making a difference and helping these patients maintain function and quality to their lives.  Thank you TPRG, so glad to be on your team!!

Ok, back to crafting.  I did a video for Colourarte with Twinkling H20 and used Club Scrap stamps.
I would like to share more information about this technique.  The results are stunning and very easy to accomplish
Black or very dark card stock can be a challenge for the stamper.  You either have to stamp in White, heat emboss with a light color or stamp your image on another color and mat with black or dark cardstock.  How do you stamp directly on this darker cardstock without using white ink or embossing powder.  The answer is bleach.  In my blog post of September 15, 2015 . the Club Scrap Challenge was to use bleach and I did, but only to alter the background.

In this technique I took it one step further.  Using the same Stamps, Transformation Stamp Set from Club Scrap, I choose the two Ginkgo leave stamps.

I tested my brown paper and blacks to determine which one gave me the "bleached color" I was after.


Bleach produces different colors on different Cardstock.  It can also be directly sprayed onto the cardstock for an interesting effect.

The Card Process:

Using the black cardstock and the smaller leaf stamp, I painted the stamp with bleach and then stamped the cardstock. This stamping needs to be lighter, so, I first stamped off onto another paper then onto the card stock.

Next I used a stamp positioner,  then I "inked the stamp" with bleach and applied to central area of cardstock. This was full strength, no stamping off.  I am trying to lighten the area that will be stamped with color.

All of the bleach stamping is complete.  See how that bleach puddled, that area will show up the colored image best.  OK, to this point, we have not changed the process much.  The next few steps is what kicks it up a notch.

Start by adding paint or ink to your stamp.  I am using Twinkling H20, as I like the glimmer and this technique is well suited to their properties.  I have done this with other water colors and ink, but I still think the Twinks shine here..

I am layering 3 different colors of paint onto my stamp.  This will then be directly stamped over the bleached image using the stamp positioner.
Once the center is stamped, spray the stamp with a small amount of water and stamp to fill in the background.
Second generation stamping finished. Light enough not to fight with the central image, but adds interest and glimmer.   You can now continue to layer more paint onto the images.  It is not necessary to clean the stamp or have the image dry to continue with layering.
Here I have layered gold onto the image.  Allow to dry naturally.  Don't use a heat tool if using any paint with Mica as the mica has a tendency to bubble when layered on this thick.

Final cards.  The image was  trimmed down and matted onto gold paper, and  then onto a black A2 card Base.  My intention was to create a set of note cards.  Beautiful aren't they!!

Here is the sprayed background finished as well.  The bleach makes the paper more porous, so it sucks up the ink.  This makes it difficult to get a crisp second generation stamp, but I like the effect of the splotchy stamping.  This piece was matted and framed and given as a gift.

Here is the link to video that shows this technique in action!:  YouTube Video

I hope you enjoyed this technique and will give it a try.  Be sure and check out all the selection of Club Scrap stamps.  They are a deep etched red rubber that shines with this direct stamping technique.


Be sure and come back for the Artist Team Blog Hop Next Month.
Happy Crafting,
Josette

Links:
Small gingko leave
Center Leaf
http://clubscrap.com
Bleach Technique on dark cardstock Video