Showing posts with label Distress. Show all posts

Wednesday, July 13, 2016

Stamping and Stenciling

Hello,
 I am back with another technique.  This month I was the guest designer for Club Scrap.  Every month one of us chose a technique and share with all the subscribers to Club Scrap Blog.  I thought I would take a moment and share this technique here.   Click the lint to go to The blog post for Club Scrap Technique Challenge or just read on.  This is a fabulous technique to give a try.

 I started out with White card stock and added a layer of Old Paper Distress Stain to give the cardstock some color.  I will include the photos here that outline the steps.
 slightly wet the paper
 Add Stain
 spray again with water and remove any excess stain.
 Dry
 Spray again if need to lighten or add more distressing
Make sure very dry before proceeding

 Tape down the Stencil
 Using a light hand, apply ink to stencil.

 I like unmounted stamps.  You can get that stamp into the smalls areas.
 Continue to stamp until you are happy

 Use Rubbing Alcohol to clean the Stencil is using an Archival ink. 
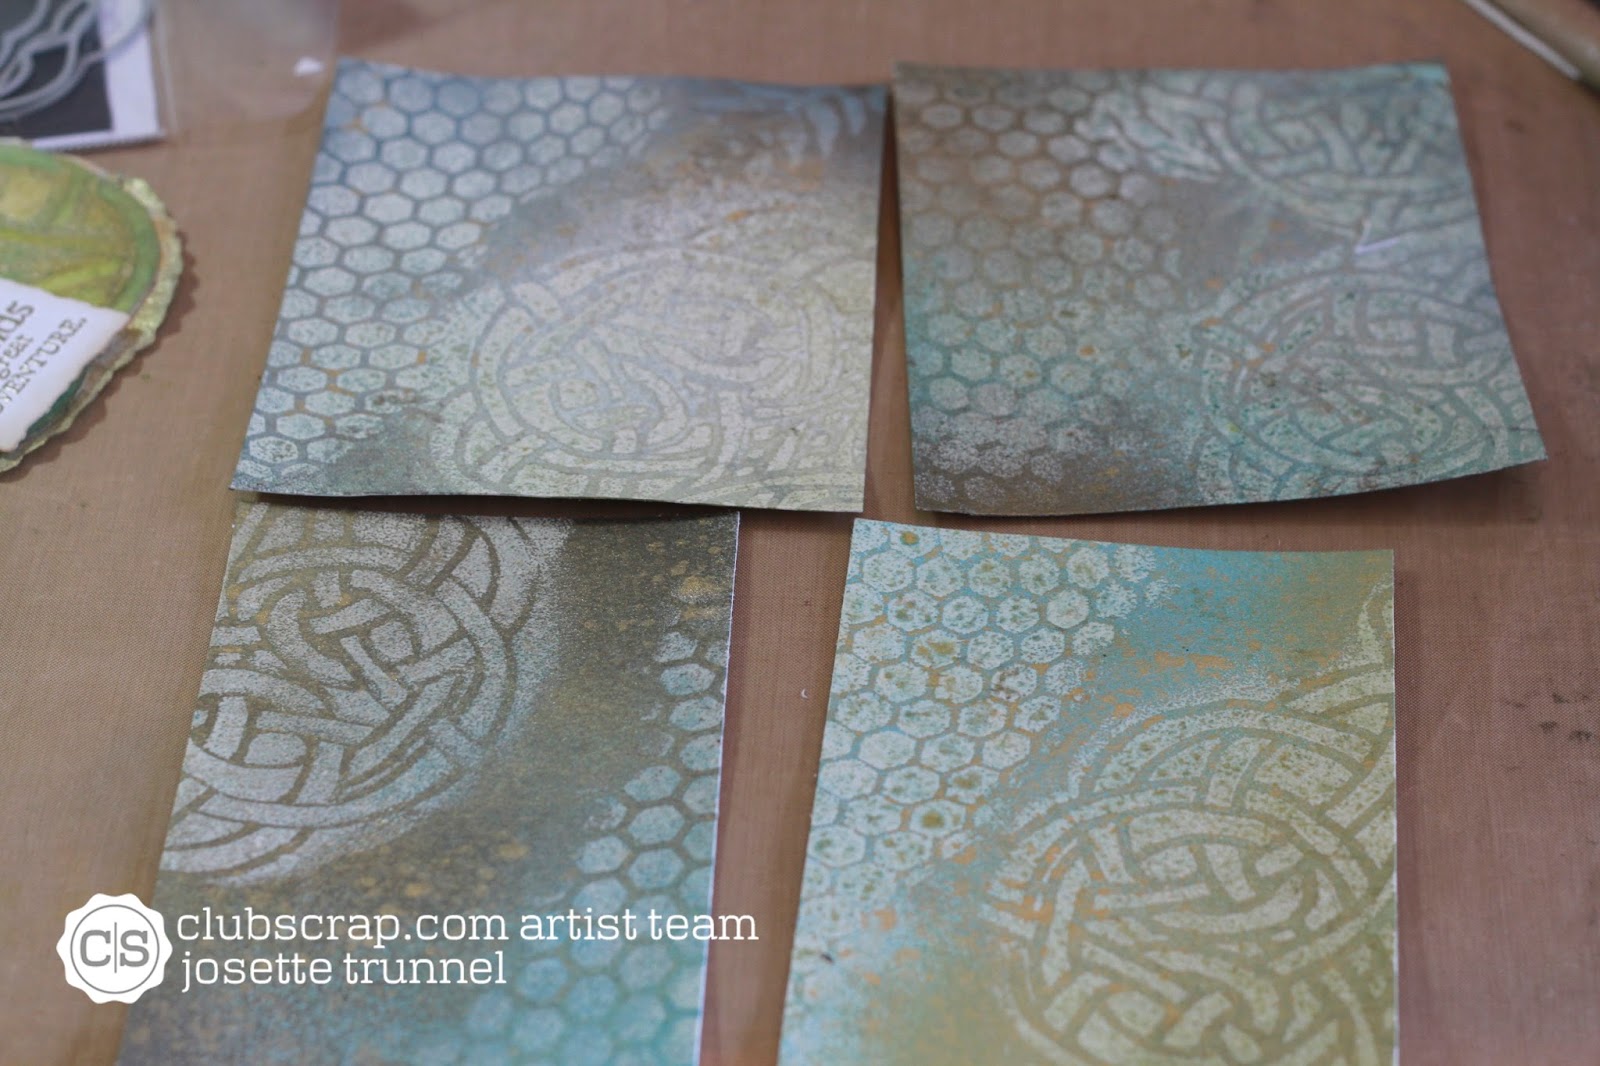
Finished with stenciling and stamping.  Cut down to 3.75" X 5.0".  Note the blended ink is soft and sparse in places, this give this a crayon colored impression.

Products used: Tim Holtz Clock Stencil, Distress Stain in Old Paper, Distress Ink: Frayed Burlap and Iced Spruce.  Black Archival ink and the word stamp is from the Crewel and Unusual Kit from Club Scrap.  

To finish my card, I stamped the coffee mug from this month's Kit: Office Space, in Brown Archival Ink and heat set with Clear embossing powder.  I fussy cut and Using a Copic Marker YG90 and YG 93 added shadow to the cup and filled in the "white space" around the handle.  This kept me from having to cut out that area. 
If you look close you can see where I added the shadow to the inside of the handle.

All that was needed was the sentiment.  So lets, take a pause here and ponder this card.
This background is busy and could easily be the focal image.  But I need more than just the background.  The coffee mug, goes along with the theme, clock time, coffee time, coffee break, get the idea.  We all work and time controls our day.  This is my hidden message.  But to bring it home, I needed a sentiment that reflects the theme. So in looking at the saying,  You might wonder who I would send this card to?  I wondered that myself, but again, this is art and who cares.  I like it, it speaks to me and someone who loves coffee would be a good recipient with a "hello message" inside.   Ok, so I justified my card and my saying.  Point here is you don't have to make "Get Well Cards, Birthday Cards, or any theme card with a message that reflects that occasion.  You can make a card just for sake of design and/or.  I have struggled with this concept for some time and in the end I decided it is what makes me happy and what I like is how I am going to address my designs, and thus my recipient will also be happy because I just know they will see my smile in the message

But how did I tie it together?  The saying...
I colored the white card stock the exact same was as the stenciled background, this is so they match.  Stamped in Black Archival.  Cut the square side down, this will lay along the right border.  Then I fussy cut to get rid of the extra paper and give movement to that inside edge.  If you look back at several of my cards, I do this frequently.  You might consider it my signature element.  I do it because I can never find the right die to fit my saying, or the area I have on the card.  I also think it adds the the uniqueness of my cards.
After I was happy with the tag, I adhered it to another area of my white card stock and cut this out using the finished tag as my guide for the border.  That gave me a white frame around my tag so that it would stand out from the background.

I added a few sequins to balance out the image, mounted it on the gold cardstock from this months kit and a green/gray from a previous kit.  I love this card!!!

Until next time:
Happy Crafting,
Josette

Wednesday, October 14, 2015

Club Scrap and a Challenge by Challenge Chicks

This month is the "Big Top" kit at Club Scrap.  A beautiful kit with lots of vintage circus charm.  I went looking for a challenge that showcased the papers and wasn't as much about technique but allowed the Kit to shine.

I found the perfect challenge on the Challenge Chicks Facebook page.  This month is the 3-2-1 Challenge.  3 papers, 2 embellishments and one sentiment.

Here is what I came up with:

I love the Sentiment!!  Of course I love elephants.

So I started with he 3 papers.  Cut them to size.  This is a 6" square card.  The very bottom layer, is a white with blue design and was cut at 5.75" square.

The Green Strip measures 5.5" x 3" and the circus paper is 4.5" x 5".

All of the papers (except the very bottom layer, the white layer) was distressed with the Tim Holz distress tool and inked.  The Green paper was inked with Distress ink: Twisted Citron, and the Circus paper with Distress: Antigue Linen.  I wanted a tone on tone look.

Here they are, distressed, inked and layered.  I did notch out the white and green paper with a punch.

The sentiment was stamped in Archival Ink:  Potting Soil on Kraft paper and heat embossed with clear embossing powder by Hero Arts.  Layered onto the front with Fun Foam.

From another paper in the kit, I cut off the border.  Using a Rosette die by Sizzix, cut and formed the embellishment.
Added a bit of twine and a button, glued into place, Finished!!!  I think it is a winner.  

 So final count:   3 papers, 1)white and blue, 2)green striped, 3)Circus print
                           2 embellishments:  1) green ribbon 2) Rosette
                           1 sentiment:  Anything unrelated to elephants, is irrelephant.
Thank you for stopping by,

Happy Crafting
Josette

Supplies and links:  Challenge Chicks
                                 Club Scrap
Big Top October Kit:  Big Top Kit

Inks:  Distress:  Twisted Citron and Antique Linen
          Archival:  Potting Soil

Embossing Powder:  Hero Arts Clear
Small piece of Kraft Card Stock
Glue, Tape runner, Button, Twine and Tim Holtz Distressing Tool

Monday, August 17, 2015

Club Scrap: Woven Threads: Team Project using Stencils

Good Morning!  I am so excited to share this kit.  Every card I have made with the stamps and stencils in this kit has been a winner.  I love anything Celtic and my color choices: gold, dark blue, light green, pewter, and silver, remind me of those beautiful manuscripts of that long ago era.  The Celtic knots are timeless.

Card 1:  Stenciled design with Stamped Sentiment
The team challenge was to use Club Scrap  stencils in our designs.  I chose two, the Celtic knot and a fern.  Come along and see what I came up with!!
Card Set 2  

ClubScrap
Card 3: Embossed and Textured


Card 1:  Clean and Simple

I started by laying out the Celtic Knot stencil onto the white paper provided in my kit, and sprayed it with Heidi Swapp's Gold spray. 

There was considerable amount of paint glistening on top of my stencil,  I just could not waste it.   I placed a black paper over the stencil and transferred the excess paint to the black paper.

Black Paper over Stencil 
Transferred Design.  Nice!!!


Design being trimmed
After drying, I cut down the white/gold stenciled image to card size, stamped my sentiment in Versafine black onxy and mounted it onto a black mat and white card base.  Elegant and simple.

Card 2:  Still Clean and Simple, with a little more details.

Next I decided to try the same technique with the fern stencil.  I used a water color paper, Canson 140# cold press, as I was imagining that I would be adding water color to the background.  This was not necessary and regular card-stock would have worked fine:
Same process, apply stencil, and mist. 

First spraying, stencil removed and now placed on a new paper with the Paint side down.  
   I repeated this process for a second set.   Now armed with 4 images, 2 positive and 2 negative, I prepared to protect the fern image.  Masking is an option, but I decided to try Ranger Microglaze.


 I covered the leaves on all four prints and buffed in the paste. 

On one set, I used a stencil and the microglaze to add texture to the background.
  Time to add color to the background.  The first set, I splattered with Heidi Swapp.
Paint  was added by opening the bottle, removing the spritzing apparatus and flicking paint onto the image, blotting ink off of the microglazed areas.  
Finished Splatters
 
Final Spray with Radiant Raine for a little more Glimmer,  Done!


 On the second set, I used Distress sprays and stain to add color.  You can see how the MicroGlaze acted as a resist.


All were mounted onto a mat and then onto a white card base and embellished with either ribbon or gold thread.  Not bad, a set of note cards, that look like they go together.  Artsy!

Set one: Gold Thread and a little bobble completes the Card.  

Set two:  Green Satin ribbon and a bobble on these Resist Textured Cards.  


Card 3:

I decided to up the complexity a bit for my third card.  I used water color paper again.  This time however, it was because I needed  the thickness of the paper as well as the absorbency  I was going to be adding a lot of media to this paper and needed it to hold up to the challenge.

First, using Distress embossing ink, sponged the ink onto the paper over the stencil.  I then added clear embossing powder and heat set.  Repeated with the other stencil. 
I had done several experiments with different embossing inks in the past. (See posting of June 2, 2015 for details).    I chose to use Distress as it is thicker and leaves a more "raised appearance to the embossing", also the coverage is easier to obtain not as "solid" coverage allowing the inks to give a more distressed appearance,

They were sprayed with Heidi Swapp sprays, again, just for consistency.  


Sprays and spraying complete.
4 backgrounds.  All slightly different, but same technique.

Next, I used Ranger Texture paste and a strip of water color paper, to create a textured image of the Celtic knot.

texture paste and stencils.  
First I textured the stencil that was more circular in nature (this was used on the card wtih saying) and the second where the knot was more linear (Bliss Card).  Thus creating 2 separate images from the same stencil.
These were dried and then painted with Distress Re-inkers mixed with water and Distress stain, tarnished brass.  After painting, they were fussy cut into their final dimensions, paying attention to the pattern


I also painted a doily with the Tarnished Brass Stain. Lastly a spritz with Radiant Raine: Gold Pearl.  This was cut and molded into a mat for the rounded texture piece.

Aclose up of background used in Final Card

Sentiments were stamped and embossed: Ranger Platunum for the saying and celtic knot and Ranger clear embossing powder for the word "Bliss".


All were layered with fun foam and mounted onto a card base.


Whew that was a lot of crafting and a whole lot of thinking.  But I think they came out wonderfully.  Hope you enjoy!!

Which one is your favorite.  Leave a comment below.  Also tell me what you like, or don't and tell me what techniques you would like to see.


Also, be sure to visit Club Scrap to see more of this August Release: Woven Strands:  club Scrap

Links:
Stencils used:  FERN
http://www.clubscrapshop.com/store/p/3985-Twin-Tags-Masking-Stencil-Fern.aspx#.Vbu_PJNViko

Honeycomb and Circles: Twin-Tags-CirclesStenci

Celtic Knot Stencil: Woven-Strands-Lite-Celtic-Knot-Masking-Stencil

All stamps  were from the August: Woven Strand Collection:  Woven-Strands-Collection-Unmounted-Rubber

Paper:       White and Blue Paper: Woven Strands Collection: Club Scrap
                  Black and Gold  Paper:  Bazzil
                  Water Color Paper: Canson 140# Cold Press
Ink:            Distress Embossing Ink, Versafine Black Onxy,
Distress:    Stains:  Fossalized Amber, Barn Red, Broken China, Peeled Paint, Tarnished Brass
                  Re-Inkers:  Stormy Sky, Faded Jeans
                  Sprays:  Fossalized Amber, Barn Red,
Heidi
Swapp:      Sprays:  Gold, Navy, Cerise

ColourArte:    Radiant Raine:  Gold Pearl

Ranger:       MicroGlaze, Platinum Fine Detail Embossing Powder, Clear Embossing Powder

Adhesive:  Scor-Tape,  Tape Runner: scotch 3M, Glossy Accents
Misc:         Fun foam, dimensional foam squares and tape, ribbon, DMC Gold Thread

Visit again Soon
Happy Crafting
Josette