Saturday, September 12, 2015

ColourArte YouTube Video is live

Good Morning;
My ColourArte YouTube Video is live and available for your viewing pleasure.  It is also available on my YouTube Channel as well.  If you are viewing this via email: click the link to go to my blog for the video. 
ColourArte

I would like to take the opportunity to discuss the technique and share some additional examples of how to use this technique.  Then watch the video to see the process in action.  Be sure to visit ColourArte for all your sparking mediums.   In the future I will explore more of the product line, but for now, the focus is on Twinkling H2O's,

Finished Project
This card appears very complicated, but in fact is simple.  Chose an image that you desire.  Any will work.  I have used this technique on Animals, Scenes, Florals and some times very simple stylized images.  Most of those are better with direct stamping, but sometimes, that process can be too iffy and this is a good substitute.

The floral image in the video was stamped with a water soluble ink, like distress and then colored in with a thick to medium consistency of H2O.  It should be the consistency of a very fluid acrylic paint but not as watery as ink.  Half and Half, perhaps.  You can vary the consistency for where you are applying and for how transparent or opaque you want the image.
Stamped image, ready for painting.  Note the pots of paint that have been spritzed with water, lined up
Once filled in, the next step is to apply ink.  I used a Copic Multi-liner .25 mm in black for all my inking.  I use a very light hand and try for "sketchiness".  I don't want a harsh line or to have the image appear to have been traced.  Nor do I want it to follow the stamped outlines.  This is how you get it to appear as an individualized art piece.

Here are two examples of this technique being used with different images.  Both are animals.  The dog was stamped, colored with copic markers, then the inking applied.  The Cats were done with water color and then inked.

Water Color and Inked. Double click to view up close

This image was colored with copic markers, Then inked using a Copic .5mm Multi-liner, finally highlighted with a white gel pen.

Water Colored Bird house using direct Stamping and then inking with the Paint and a fine brush

The final photo is also of a watercolor, but this was done with direct stamping using watery Twinkling H2O's.  After stamping and allowing to dry, the image was enhanced with a very fine liner brush and paint that had been thinned with water to the consistency of ink (whole milk).  All of the "inking" was done with a paintbrush.  Just another idea to enhance your stampings.

Watch the video to see the entire process.
Don't forget you can find your Twinkling H2o here:  ColourArte

Thank you for stopping by!
Be sure and leave a comment about what you would like to see more of or less of.
Any suggestions for future topics are welcomed.

Stay tuned for more stamping tomorrow with a posting about Club Scrap and the new Kit.
Happy Crafting!
Josette


Tuesday, September 8, 2015

How to direct Stamp with Twinkling H2O's.

I have been busy creating my first project for the ColourArte Video posting.  It is a process with a very steep learning curve.  I had to fix my camera mount, lighting and work area to make filming easier.  After creating my test video, the deficiencies of my set up were apparent so I set about to correct this.  My current setup still needs work but thanks to my husband's help is coming along!!!

As a lead in to my first Video episode, I would like to share my test video and discuss why I chose to start with with this project.
Little pots of Wonder
Where to buy Twinks?  Click here
Thoughts:  I love Twinkling H2O's.( Where to buy Twinks?) They were one of the first purchases I made as a new crafter.  The lure of a sparkle in a water color was too much to resist.  I bet you all have those amazing little pots of wonder in your stash!!  Do you use them?   If you are like most, the answer is NO.  The why of this has always puzzled me, but then I remember my first experience using them and understand why.  But I would like to encourage you to get them out and play.  I hope these videos will inspire you.

When I started to pursue being a design team member, my first objective was to educate.  Where better to start than with Twinkling H20's.

Let's start with a few guidelines to get you started into exploring Twinkling H2O.
Always begin by laying out the colors you are planning to use and then spray with water about 5 minutes before you start.  How much water is very subjective.  I generally just spritz to start the activation and then add water based on how quickly the  water is absorbed.    I generally like them a bit thick and will  dilute later if needed .  The more you use them, the less water it takes to activate them.  Final step before painting and a very important step is to Stir.  Most forget this  step or don't realize that it needs to be done.  These have mica in them and the mica needs to be distributed into the paint so that you get a nice even glimmer or shine.  Many times I hear that "they are too dull" or very transparent.  These simple steps will help solve these issues.  1) spray with water 2) let sit for 5 minutes and 3) Stir.
Now that you have the basics down,   join me as we explore various uses and techniques using Twinkling H20's.

The projects: The first project with Twinkling H20 is direct stamping.  This is a very easy technique to master.  You can achieve a painted appearance or a water color appearance, by just adjusting the water and consistency of the paint, or spritzing the painted stamp prior to stamping.  


combination of techniques, but all were direct stamped.
These were all done with the same process.  Only difference was the addition of water.  The Twinkling H20 directly applied to the stamp, stamped and then doodled around the image to give it an inked appearance.  Final step was splattering with pain and mounting it onto the card.  Enjoy the video as I go through the steps
Very thick application of paint, very little water


Direct Stamping with Twinkling H20

On Saturday, September 12, my second video with Twinkling H20 will premier on ColourArte's YouTube Channel.  Remember to check back here for links and information.  You can also subscribe to  ColourArte's You Tube Channel.  Then you won't miss an episode of my creations or tany of t he other team members projects.

Don't forget to subscribe to my blog, so you will stay updated on all of the exciting projects from ColoruArte and Club Scrap, as well as my own creations.

Happy Crafting,
Josette

Wednesday, August 26, 2015

Blog Hop: ClubScrap Woven Strands

Club Scrap
Welcome to the Blog Hop!!!

You should have arrived here from JILL,  if not or if you are lost, you can always start back at the beginning by visiting  Club Scraps Blog Page

Let me tell you about my projects.  I have two.  I wanted to continue my focus on the Celtic Knots but decided that I needed to create a project that was not just about the Celtic knots, that is why there are two, one with knots and one without knots.    Let me show you what I came up with.

Celtic Note Card Set:
The project: 4 note cards and a box!
Basic cards, nothing fancy!  All were stamped with Archival Brilliance in Galaxy Gold and heat embossed with Wow!Brass embossing powder.  I chose this combination of ink and embossing powder as I needed the lines to be a little thicker so they did not get lost in the coloring.  All were colored with Copics:  G17, B37.  The six knot card also used B05 and YG23.  This finished cards are all A2 (4.25" x 5/5"). Measurements:
White card base: 3.5 x 4.75 inches.
Blue Card mat:   3.75 x 5.0 inches
Green Card mat: 4.0 x 5.25 inches.

 Fine details:  I used a MISTI.  If you are not familiar with this tool, let me tell you it is one of the best inventions ever.  Getting the detail and even stamping, for this project required repeated stamping.  In the end this yielded an even stamping and embossing, which made coloring easier and a pleasant finished project.

After all that stamping and coloring, I did not want to mess it up with the sentiment:  MISTI saved me again!
Coloring the image with Copic

 These were matted with blue and green (both from the Woven Strands kit) and mounted on a white card base.

 I stamped an embossed the tree image onto the card-stock that would become the box for the cards.  Then the card stock was cut and scored.   the card stock was cut: 5 5/8 X 6 3/4 and the top scored at 1/2 + 1/6, the bottom at 1/2 ". This makes one slightly bigger than the other so they fit together.  The corners were cut into tabs.

Boxes are scored, creased and tabs ready for glueing
Glueing tabs
                                                                                               
Glued and drying

The finished box!!


A close up of my favorite card.  

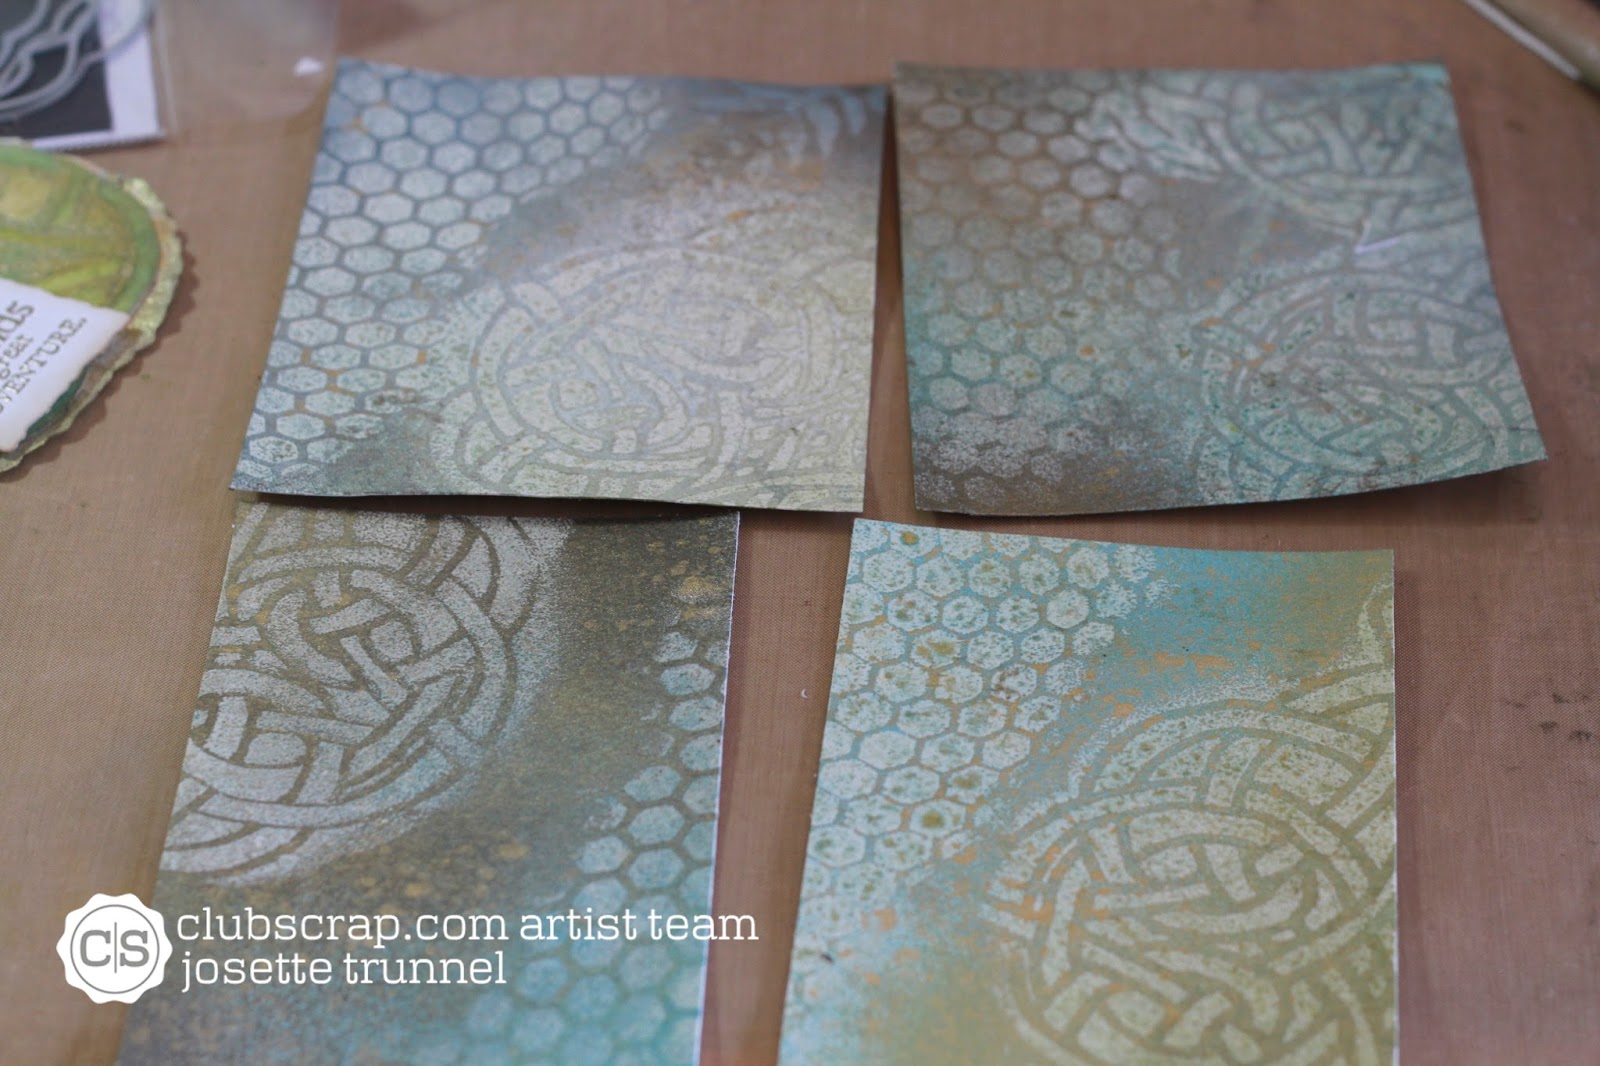
 The next two cards are just fun.  I had created the backgrounds while  I was playing with the stencils.  I thought they would make a fun happy card.

Card One:

All you see is Polka dots here, but check out how the background really looked!!!
Carson Water color paper, stenciled, layered onto a peach card base.  Green mat under sentiment was from the kit.  Seam tape was color with Distress Fossilized Amber and sequins were scattered.  Cute!!
Process:
Mustard Seed, Twisted Citron, Abandoned Coral
I am working from the outer edge in.  Note how applicator is angled.

Nearly finished 
Finished.  Looks almost 3d.  Love the stencil!!  I did spray with water to help blend the colors on the final project, but wish I had not.  This is way cool looking.

Card 2:


Happy card!  The saying just went with that crazy background!  

Same process as above: I applied the ink more heavily and misted .  Same distress colors but I also used Blueprint Sketch and Picked Raspberries.  This is the honeycomb Stencil.  

Hope you are enjoying the blog hop!!  Don't forget to leave a comment!  Your next stop is:  Julie.

Links:
Club Scrap
Woven Strand Kits
Honey Comb Stencil
Twin Tags Circle Stencil

Other Supplies:
Paper: Green and White from Kit, Peach: Bazzill,  Canson 140# Water Color Paper
Ink:     Distress:  Mustard Seed, Picked Raspberry, Blueprint Sketch, Abandon Coral, Twisted Citron,                                                
           Fossilized Amber
           Versafine:  Onyx Black
           Archival:  Brilliance, Galaxy Gold
Embossing Powder:  Wow!, Brass and Ranger clear
Seam Tape:  White
Various sequins from Pretty Pink Posh
Copic Markers:    G17, B37, YG23, B05
Fun Foam, Score Tape, Ranger Matte Medium, ATG tape runner

Hope you enjoy the hop,
Happy Crafting
Josette


Saturday, August 22, 2015

ClubScrap's Woven Strands Meet Twinkling H2o's

While playing and stamping with this stamp set, I remembered seeing a post about Twinkling H2O's embossed with  gold and on a black background and decided I needed to give it a try.  So here is my results.  I am very pleased with the finished card.
Gold on Black: a winning combination.  Add a little sparkle: Magic
Let me take you through the process.  This is a very simple card but has a lot of little details.

Started with randomly stamping in gold ink and heat embossing in Gold.  
First I just stamped different patterns with the stamps and when I found a pleasing combination and pattern, stamped in gold and heat embossed using Ranger Fine Detail Gold Embossing powder.  On the left side, you will see some coloring.  I had thought to color the background, but it seemed to detract from the simple elegance that black on gold gives.
Chose area that I wanted to use and trimmed out
Now time to move onto the focal image.  I would like to stop here and discuss embossing powders and why I chose what I did.  I wanted clean crisp lines with space for the Twinks.  The only combination was a solvent or pigment ink and a fine detail powder.  I ended up using Archival Brilliance in Gold with the Ranger Fine Detail Embossing Powder.  Other combinations worked, but the line was either too thick or the image not crisp enough.  A lot depends on what you want the final image to be.  In my next posting I used a different combination for a different set of reasons.  I say this, as we seem to get caught up in who is using what.  What really needs to happen, is "What do you want" and why.  Then make your choice.  Even a change in paper will produce a different result.  Experiment and let your eye choose.

The embossed image.  You can appreciate the fine crisp lines here.  Note the white "halo" in the back.  When you are working with this much detail, try different methods of antistatic, they all work a little differently.  Here I used plain baby powder, aprinkled onto the card and dusted off with a blush brush.  No stray powder.
Time to paint.  I used 3 Twinkling H2O's :  Lucky Apple, Lemongrass and Autumn Butternut.
A small amount of water was added 5 mins before painting to give a thick but fluid paint that stayed nicely inside of the embossing.  
Cut with a Spellbinder die, baby powder removed and matted with  gold cardstock, also cut with the same die set.  
Sentiment: Also embossed in the same manner as the focal image.  The matting and tag was trimmed to finished dimensions.
To complete the card: A mat was cut from Gold Card-stock for the back ground, and mounted on a 5x7 black Card Base.  The focal image and sentiment were adhered using Fun Foam!  Done

Finished views:


Links:
Club Scrap
ColourArte
 Club Scrap:
 ColourArte

Supplies:
Tree and Thank you: Woven Strands Collection by Club Scrap
Twinkling H2O's

Tree and Thank you: Woven Strands Collection by Club Scrap

Twinkling H2O's


Other supplies:
Paper: Bazzil:  Black linen weave, Gold: Ranger
Embossing Powder:  Ranger Fine Detail Gold
Ink:  Archival Brilliance: Gold
Fun Foam, Scor-tape for adhesive
Dies: Spellbinders Nestabilities Imperial Gold: Gold Circle One:
Dies: Spellbinders Nestabilities Imperial Gold: Gold Circle One: 

Until next time:
Happy Crafting
Josette

Thursday, August 20, 2015

Little Bits: : Club Scrap: Woven Threads: Team Project using Ste...

Little Bits: : Club Scrap: Woven Threads: Team Project using Ste...: Good Morning!  I am so excited to share this kit.  Every card I have made with the stamps and stencils in this kit has been a winner.  I lov...

Monday, August 17, 2015

Club Scrap: Woven Threads: Team Project using Stencils

Good Morning!  I am so excited to share this kit.  Every card I have made with the stamps and stencils in this kit has been a winner.  I love anything Celtic and my color choices: gold, dark blue, light green, pewter, and silver, remind me of those beautiful manuscripts of that long ago era.  The Celtic knots are timeless.

Card 1:  Stenciled design with Stamped Sentiment
The team challenge was to use Club Scrap  stencils in our designs.  I chose two, the Celtic knot and a fern.  Come along and see what I came up with!!
Card Set 2  

ClubScrap
Card 3: Embossed and Textured


Card 1:  Clean and Simple

I started by laying out the Celtic Knot stencil onto the white paper provided in my kit, and sprayed it with Heidi Swapp's Gold spray. 

There was considerable amount of paint glistening on top of my stencil,  I just could not waste it.   I placed a black paper over the stencil and transferred the excess paint to the black paper.

Black Paper over Stencil 
Transferred Design.  Nice!!!


Design being trimmed
After drying, I cut down the white/gold stenciled image to card size, stamped my sentiment in Versafine black onxy and mounted it onto a black mat and white card base.  Elegant and simple.

Card 2:  Still Clean and Simple, with a little more details.

Next I decided to try the same technique with the fern stencil.  I used a water color paper, Canson 140# cold press, as I was imagining that I would be adding water color to the background.  This was not necessary and regular card-stock would have worked fine:
Same process, apply stencil, and mist. 

First spraying, stencil removed and now placed on a new paper with the Paint side down.  
   I repeated this process for a second set.   Now armed with 4 images, 2 positive and 2 negative, I prepared to protect the fern image.  Masking is an option, but I decided to try Ranger Microglaze.


 I covered the leaves on all four prints and buffed in the paste. 

On one set, I used a stencil and the microglaze to add texture to the background.
  Time to add color to the background.  The first set, I splattered with Heidi Swapp.
Paint  was added by opening the bottle, removing the spritzing apparatus and flicking paint onto the image, blotting ink off of the microglazed areas.  
Finished Splatters
 
Final Spray with Radiant Raine for a little more Glimmer,  Done!


 On the second set, I used Distress sprays and stain to add color.  You can see how the MicroGlaze acted as a resist.


All were mounted onto a mat and then onto a white card base and embellished with either ribbon or gold thread.  Not bad, a set of note cards, that look like they go together.  Artsy!

Set one: Gold Thread and a little bobble completes the Card.  

Set two:  Green Satin ribbon and a bobble on these Resist Textured Cards.  


Card 3:

I decided to up the complexity a bit for my third card.  I used water color paper again.  This time however, it was because I needed  the thickness of the paper as well as the absorbency  I was going to be adding a lot of media to this paper and needed it to hold up to the challenge.

First, using Distress embossing ink, sponged the ink onto the paper over the stencil.  I then added clear embossing powder and heat set.  Repeated with the other stencil. 
I had done several experiments with different embossing inks in the past. (See posting of June 2, 2015 for details).    I chose to use Distress as it is thicker and leaves a more "raised appearance to the embossing", also the coverage is easier to obtain not as "solid" coverage allowing the inks to give a more distressed appearance,

They were sprayed with Heidi Swapp sprays, again, just for consistency.  


Sprays and spraying complete.
4 backgrounds.  All slightly different, but same technique.

Next, I used Ranger Texture paste and a strip of water color paper, to create a textured image of the Celtic knot.

texture paste and stencils.  
First I textured the stencil that was more circular in nature (this was used on the card wtih saying) and the second where the knot was more linear (Bliss Card).  Thus creating 2 separate images from the same stencil.
These were dried and then painted with Distress Re-inkers mixed with water and Distress stain, tarnished brass.  After painting, they were fussy cut into their final dimensions, paying attention to the pattern


I also painted a doily with the Tarnished Brass Stain. Lastly a spritz with Radiant Raine: Gold Pearl.  This was cut and molded into a mat for the rounded texture piece.

Aclose up of background used in Final Card

Sentiments were stamped and embossed: Ranger Platunum for the saying and celtic knot and Ranger clear embossing powder for the word "Bliss".


All were layered with fun foam and mounted onto a card base.


Whew that was a lot of crafting and a whole lot of thinking.  But I think they came out wonderfully.  Hope you enjoy!!

Which one is your favorite.  Leave a comment below.  Also tell me what you like, or don't and tell me what techniques you would like to see.


Also, be sure to visit Club Scrap to see more of this August Release: Woven Strands:  club Scrap

Links:
Stencils used:  FERN
http://www.clubscrapshop.com/store/p/3985-Twin-Tags-Masking-Stencil-Fern.aspx#.Vbu_PJNViko

Honeycomb and Circles: Twin-Tags-CirclesStenci

Celtic Knot Stencil: Woven-Strands-Lite-Celtic-Knot-Masking-Stencil

All stamps  were from the August: Woven Strand Collection:  Woven-Strands-Collection-Unmounted-Rubber

Paper:       White and Blue Paper: Woven Strands Collection: Club Scrap
                  Black and Gold  Paper:  Bazzil
                  Water Color Paper: Canson 140# Cold Press
Ink:            Distress Embossing Ink, Versafine Black Onxy,
Distress:    Stains:  Fossalized Amber, Barn Red, Broken China, Peeled Paint, Tarnished Brass
                  Re-Inkers:  Stormy Sky, Faded Jeans
                  Sprays:  Fossalized Amber, Barn Red,
Heidi
Swapp:      Sprays:  Gold, Navy, Cerise

ColourArte:    Radiant Raine:  Gold Pearl

Ranger:       MicroGlaze, Platinum Fine Detail Embossing Powder, Clear Embossing Powder

Adhesive:  Scor-Tape,  Tape Runner: scotch 3M, Glossy Accents
Misc:         Fun foam, dimensional foam squares and tape, ribbon, DMC Gold Thread

Visit again Soon
Happy Crafting
Josette