Showing posts with label Shadow Box. Show all posts

Friday, September 23, 2016

Club Scrap: Team Challenge for September 2016

Hello again.  Feels like a lifetime since I sat down to blog.  I will post an update on the happenings at Little Bits, non creative world, but for now I need to join in on the team challenge.

This month the challenge was to incorporate wood into the project and I have my go to project.  I just love this technique and it can be changed up in so many ways.  But before I start, lets take care of the housekeeping issues.  You should have arrived here from:  Jennifer.  If you got lost, you can start at the beginning: Club Scrap link.  Your next stop is:Deb

Ok for the project:  I used this months kit: Garden Shed and a frame from Pink Paisley.  Any similar frame would work.

Prepainted

 Using this product as a resist, I painted on several areas.

Close up of the resist. 

Using a variety of spray inks: Tattered Angels, Heidi Swapp and ColourArt Sprayed the frame until I had the right color.  I was using the ribbon in the kit and the paper for inspiration.  

Once Dry I cut a piece of paper and adhered to back and attatched a clip board holder.

Last step was to stamp words and images onto the frame using black Archival Ink. 


Now onto the sayings:

I cut a piece of cardstock 3.5 X 4" and then used a square die to make a "Polaroid Like frame.

I was going to play with the new digital files, but in the end fussy cut the sayings that were in the kit, stamped the frames and then cut a second rectangle to completely finish the back.  Nice.  

Once I had this all done, it just looked plain.  So off to Hobby Lobby and purchased some flowers, made an arrangement, tied a bow, added a bird, Finished. 


 The sayings can be changed as the mood strikes, or it can be used as a shadow box to display a photo.   I apologize for the photos, I redid my craft room and messed up my lighting.  I will fix it for the blog hop, i promise. 

Glad to be back crafting again,
See you next week for the blog hop and I will post a complete update on my Daughter's equestrian Journey to the Paralympics.  
Happy Crafting,
Josette

Links:

Garden Shed.

Monday, April 25, 2016

Club Scrap: Team Challenge for April

Here we are, another month nearly gone.  This months kit is a lovely floral collection: Dahlia.
You should have arrived from:  Lillian and if you got lost along the way, you can always start at the beginning by Club Scrap.

This month the challenge was to make flowers and or butterflies.  I struggled with this.  I have made flowers for cards, but my flowers are always too big and my interesting butterflies are often too big to.  So rather than a card, I thought I would make a shadow box and show you some tricks.

This was very difficult to photograph and I think you will get a better appreciation by seeing the individual parts.

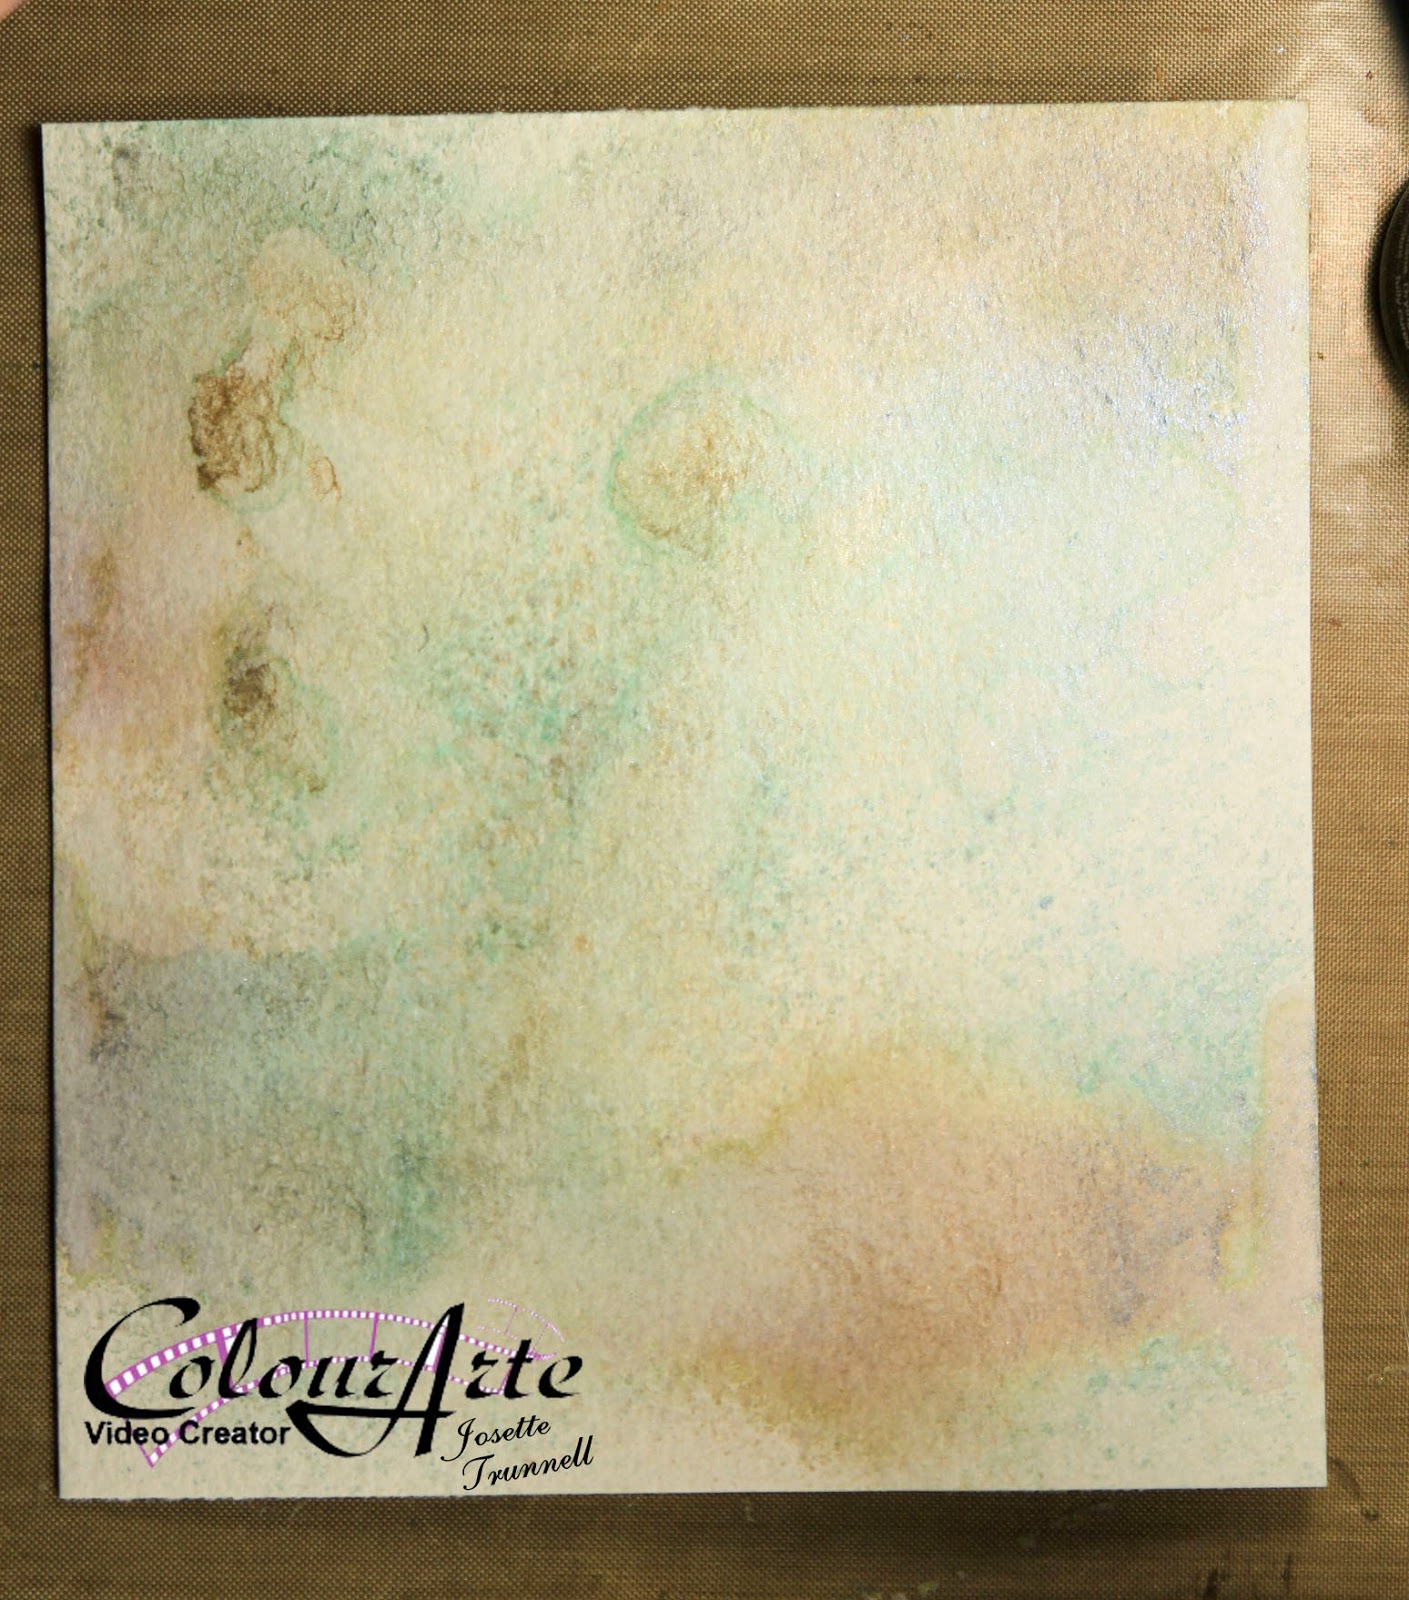
Lets start with the background.  This is a fun technique.  In the kit was a white paper with resist.
I started with the large flower on the right.  Using a very dry sponge that had been loaded with Aged Mahogany and rubbed off, I colored the flower.  Then I used Crushed Olive, also with a very dry sponge and blocked out the green areas.

Next, I inked up the dauber, and working fast, added areas of intense color in both colors.  So, I darkened the flower in areas and added more color to the leaves.  Next I took a baby wipe, and spread the color around quickly over the entire paper.    I did not stay in one place long, nor rub hard.  I let this dry.  Enhanced the color in areas that needed more intesity.

This is true color.  I could not capture the richness of the background inside the farm.  But it is very lovely. Once dry I trimmed it down and glued it directly to the backing board of the frame.


Next onto the flowers.  I love glassine for flowers, they have texture and take up the color well.
So I cut several flowers from glassine, using the tattered floral and leaves from Tim Holtz.
These were arranged and grouped, then held together using a brad, and scrunched.


Then they were sprayed with several different colors of Radiant Rain until they looked like I thought they should.  Hit them with my heat tool to set the wax and dye, sprayed with gold to give more shine and allowed to dry.

Beautiful aren't they!!!

Ok, onto the butterfly.  I started out by cutting several different shapes from chip board.  Then I mixed different embossing powders.  Chucky, glittery, fine, gold, silver, colored, until I had what I thought was a good mix.

Coated each of the chipboards with versa mark that I thinned with glycerine, and heat embossed. I adjusted my embossing mix, to get several different colors.

She how they are not smooth.  The different mixes of powder sizes and careful heat application gives them texture.

Lastly I embellished them with crystals.  Only one made the cut, but the rest will find projects to adorn.  I just never know what will work, so I make several and then choose.

Only thing left was to color the ribbon, which I did with a blend of Crushed Olive and Aged Mahogany.  Then arranged my bouquet.

The trick to getting this arrangement to have dimension is foam dots and fun foam.  The flowers were glued onto a piece of cardstock, then leaves added around then.  The cardstock was trimmed away and fun foam added.

Here you can see the cardstock and fun foam.  Ugly, but when mounted, no one will see.

If you look close, you will see the foam pads between the petals.  Note the pink fingers, a week later, they are still pink!!!  Someone thought it was from removing acrylic nails, Really?  I have bleached my hands, scrubbed, wash my hands at least 20 times plus per day, I am still pink!!  Oh well, makes for good conversation.

A close up of the arrangement.  This is a beautiful piece.  I am distressed that the photos don't do it justice, but at least you can be inspired by the process.

You are All done!!  Thank you for joining us on todays Hop.  Come back later this week for the Blog Hop.  or start At the Beginning at Club Scrap Blog

Until next time,
Happy Crafting,
Josette

Links:  Club Scrap
Supplies:
Kraft Glassine by Ranger
Distress Inks
Radiant Rain by Colourarte
Dahlia Deluxe Kit
Frame was from Michaels.
Assorted embossing powders.

Sunday, November 15, 2015

Sweet Stamp: Anything But a Card Challenge

Stop by Sweet Stamp Blog and see all the wonderful creations for this Challenge.  I created a mate for my ColourArte Shadow Box.  Together they will make a nice arrangement.

I used the same background, or rather similar to the background used on the ColourArte Butterfly piece.  The video that shows this technique is located here:  YouTubeVideo: Reverse Stenciling.

I started with the Stenciled background, cut it down and matted it onto a Bronze Shimmer Cardstock. Then I distressed the edges and curled the corners.

Using Piccolo's from Sweet Stamp (product list in description) they were covered with enamel powder and heat set.  Several different Enamel Powders were used but all had the molten metal as the base layer.  Bow was created from seam tape and was colored with Distress inks: Picked Raspberry and Festive Berries.  Then just before completely dried was spritzed with ColourArte: Ancient Coin that had been mixed with water in a mini-mister by Ranger.  Once dried, a bow was tied.  In the video is a demonstration of the bow being tied.

The large butterfly is a Piccolo from Sweet Stamps and the smaller one is a Sizzix mover and shaper die.  Both were coated with Piccolo enamel adhesive and heat embossed using Enchanted Aubergine from Sweet Stamps.  The final step was to adhere some crystals in various purple shades to the wings.
The entire project was placed into a 5 X 7 " Shadow Box frame.

I think it turned out very well.  The organic nature of the gears with their gold shimmer adds to the elegance of the jewel encrusted butterflies. Thank you for stopping by to share my "Little Bits" of inspiration.
Happy Crafting
Josette

Supplies and Links
YouTube ColourArte Video
Previous Blog posting:  November 14, 2015, Reverse Stenciling
Adhesive Fluid_for_Enamel_Powders 
Enamel_Powder_
ENCHANTED_AUBERGINE
Fine-Detail-EP-MEDIEVAL-METALS
MOSSY_GLEN
I also used a very small amount of a reddish orange embossing powder to simulate rust on the gears.  Real Rust by Sweet Stamps would be a good choice
Piccolos:
Vintage_Gears_Large_
Vintage_Gears_Large #2
Large_Butterfly_Accents

Saturday, November 14, 2015

ColourArte Video Time: Reverse Stenciling, Butterfly Shadow Box

It is time for another project for ColourArte.  I love backgrounds.  If I could just make backgrounds I would be happy.  Backgrounds however, are nothing without the rest of the story.  So lets discuss the background as well as the finished piece.  This project's technique is how to Reverse Stencil with ColourArte Silks.
The Background
As with all techniques, there is a learning curve to get the right combination of products.  I tried stenciling first and then coloring the background.  While it worked, it lacked the depth of this example.  I tried various products as well.  Silks gave me the softest and most distinct image transfer.
Here are a few of the backgrounds that were created during my exploration of this technique:
This is the stencil using Radiant Gels and is done in the traditional stenciling manner.  Note the "gears" are the white space.  If you want the opposite from your stencil, this technique fits the bill.  I tried reversing this stencil, it worked but the finished product had a lot of texture but no distinct image.  Might work better with a different stencil.  This one had a lot of "plastic" to cover.
Another example, this one is using Silks and is reversed Stenciled in the same manner as demonstrated in the video.  Not bad, will use if for another project later.  To "bold for this project.  
Background prior to stenciling.  This was Water Color paper misted with a mixture of water and Primary elements.  I went with less concentration of color to give a soft background with areas of more intensity.
After I finished the background the challenge was to find a way to use it, so let see what I came up with.
The background supports the focal images without being overwhelming.
The flowers were misted and daubed with several Radiant Rain Products and Primary Elements.  

The ribbon was created by spraying and daubing Radiant Rain products as well as the same sprays used on the background to create a harmonious composition on Seam Binding.
Beginning of ribbon coloring.  Once the ink is laid down, water is added and then the ribbon is kneaded to blend and distribute the colorant.  I appears very bright and bold here, but once dried, matched the background very well.

The very back, background was made by spritzing the Primary Element spray through a texture plate by Gina Designs.
The ink was blotted up to give a faded distressed feel.  This wasn't necessary as most of it was covered with the focal background.  But is a good technique to use for another project.  
The most rewarding part of this project were these butterflies.  I had received a sample of Embossing Powders from Sweet Stamp.  I was playing with them when the idea came to me to include them over the background.  I was going to add gears and metal to make a steampunk project, but the idea of adding the butterflies to the gear background seemed right, Organic meets natural.  But I needed them to match my project.  I did not have any powder that matched.  After much thought decided to create my own.

I combined:  embossing powder fine detail, with chunky. Glitter, both fine micro glitter and Distress.  Distress Embossing Powder, Glittered Embossing Powder, plus some of the samples that I had received from Sweet Stamps.

Once embossed, they were further enhanced with the Emperor's Gold Silk and Radiant Rain Sprays.

Final step was to distress the background and apply ink to the edges and enhance the colors within the background.  I find that Distress Ink goes with everything!!
Distressed and ready for ink.  Tumbled Glass and Walnut Stain Distress.
Final product!!  Beautiful.

Link to YouTube: Watch the process

Hope you enjoy!!
Until Next time, Happy Crafting
Josette

Links:
Colour Arte:  http://colourarte.com
YouTube: ColourArte Channel

Supplies:
ColourArte
Radiant Rain:            Egyptian Gold Dauber
                                  Nutmeg Spray
                                  Guatemalan Dauber
                                  Teal Zircon Spray
Primary Elements:    Beach-House Blue
                                  Ancient Coin
                                  Burnt Umber
Silks:                         Emperor's Gold
                                  Olive Vine

Other Products used:
Strathmore 400 Series, Cold Press Water Color Paper, 140#
Distress Ink;            Tumbled Glass
                                Walnut Stain
Dies:                        Sizzix: Movers and Shapers butterflies , and Large Butterfly
Sweet Stamp:          Enchanted Aubergine Embossing Powder
                                Mermaid's Tears Embossing Powder
                                Piccolo Enamel/Embossing Powder adhesive

Products used to create embossing Powder mix:
Sparkle and Sprinkle: Opaque:  Candlelight and Mediterranean Star
Tsukineko:    Verdigris
Distsress embossing powder:       Walnut Stain
Distress Glitter:  Tarnished Brass
                            Peeled Paint
                            Peacock Feathers
Hero Arts:  Clear
Stamendous: Aged Gold, Aged White,